Showing posts with label handmade jewelry. Show all posts

Monday, December 23, 2019

Crying Eye Pendant, Custom Order


A customer sent me the picture below of a crying eye (eye with tear) and asked if I could replicate the design for his girlfriend.  


Below, you can see my design from this original photograph (with my personal touch). 


First, I made a sketch with the measurements needed for the pendant.  

Second, I chose sterling silver and solid silver as my preferred metals because that's what I had on hand.  

Third, I chose a lavender color cz stone for the tear (as was required by the customer).


Initially we wanted to use a piece of beach glass as the tear drop but my sea glass pieces were too big for this project (and I didn't want to have to cut a piece of glass for it was just too small to handle).


In my original design, I had the idea of using PMC silver clay, which is a precious metal clay (a wonderful product because you can work it like clay then fire it in the kiln so that it burns off the clay and you're left with a solid piece of sterling silver or pure silver depending on the clay type you use).  Actually, you can also purchase this clay in less precious metals like copper, bronze, and of course you can also get it in PMC (precious metal) gold.  I've never used any other clays other than the PMC3 silver and the Art Clay 950.  Although silver clay is available on Amazon.ca I noticed the others are only available on the Amazon.com site.

If you are like me, and love to learn about new techniques, then you will enjoy learning about how to use silver clays with this how to book (it's worth knowing what you're doing because this clay can be tricky). Here are a few good books from the Amazon.com site 

*My blog contains affiliate links, which means that when you make a purchase via these links, the company may compensate me for promoting their products.  I only promote products I use or that I know are of the best quality.  Thank You.


What happened to my initial idea of using PMC3 Silver, you might ask?  Well, I did the entire pendant with the exception of the bail and everything looked beautiful (I was quite proud of myself especially since I was using the Clay 950 for the first time).  
After removing it from the kiln, I was giving it a good polish to get the metal to glisten like it should, and it looked amazing.  I knew the client would be very pleased!  

And then, to my horror, during the last shining, the pendant got caught in the polishing bit, twisted, under the pressure of the Foredom machine, broke into pieces that were flung across my studio (I have yet to find one of the pieces)! 

I had no time to be emotional, no time to panic, nor to give up.  The pendant was a surprise gift and my client was counting on me.  He was on his way to pick up the pendant the very same day.  I had to use my plan B (yes, I most of the time have a plan B with this type of project).

I took a breath, gathered what I needed to construct the eye (using silver .999 sheet and sterling .925 heavy gauge wire) and got to work.  

To my relief, in no time, the eye came together quite nicely; I was satisfied with the overall look.  

After cleaning and polishing it up, I added the cz stone and placed it in the jewelry box ready for pick-up.  

Results:  Happy client and a very happy recipient, the girlfriend!

Quote:  Patience, persistence and perspiration make an unbeatable combination for success!


Monday, December 25, 2017

Finished Copper Pick Bracelet


So here is a picture of my finished, pick bracelet on 1.0 mm black leather cord.  Very unique piece indeed!  I decided to go with the slipknot instead of a clasp because I find it just looked really nice this way.  Plus, it can fit a variety of sizes. 


In my previous blog post, I wrote about I hoped to be able to achieve a mirror finish.  I looked it up online and followed instructions and it came out pretty good.  I'm happy with the finish product!

The pick bracelet is an awesome gift idea for the guitar player.  You can purchase this bracelet from my website Bayside Wire Designs

Wednesday, May 10, 2017

Sixty Six Bracelets Later


I finished the bracelets I talked about in the previous post! I'll admit it was not easy! My finger tips have yet to recover from handling the metal and sliding the waxed cord knots. I've been applying vitamin E oil repeatedly, which is quite soothing. I hope I don't develop huge calluses on my fingers... well, at least they'll match my unsightly nails!! The sanding did a terrible number on my nails.

So, after all that whining, I'll share with you some pictures of what started as basic pieces of metal and cotton string...


...is now this:


I really like the blue, waxed cotton (reminds me of jeans); I just love it!


All of the little bracelets have been neatly tucked away in cute, shiny, gift bags and ready to be shipped.

Although the project (66 handmade bracelets) was a bit daunting at times, especially when I would need to restart a piece because of an engraving error (this happened quite a few times because of a little mishap with my engraving machine. Although it set me back a bit, I powered through and was successful in completing the project without being overwhelmed. And I have to say, at the end of a project like this, I always feel happy to have given my all.


Saturday, April 22, 2017

66 Personalized Bracelets to Make

I've got a large order of 66 personalized bracelets. How can I make all those bracelets without being overwhelmed and losing my mind?? One bracelet at a time. Being constant is the trick for me.

The first step was to take my template and mark the sizes on my metal and then "cut each one by hand with metal sheers." I know!! Who does that?

The strips in the pile you see in the 1st photograph, have all been cut and roughly sanded into shape (I use an electric power tool for that job). Because I'm using a power tool, the strips get hot! hot! hot! I cannot hold them without a thick cloth to protect my fingers.

Also, you'll notice I drilled the holes in the metal strips. I love drilling the holes! Because I dip the tip of my bit into beeswax, there is a lovely honey scent in my studio! Oh! And check out the wood piece in the top photograph (the bottom left corner). See the holes? Those are the holes I leave behind after my drill bit goes through the metal and into the wood. Better to do that than ruin my table surface!

My next step is brushing my metal for a nice finish!

I'll keep you posted of my progress!

Thanks for dropping by. If you enjoyed my post, please share.

Saturday, April 8, 2017

What Can You Make with Washers?

I purchased a bunch of small washers and was wondering how to use them in my jewelry designs. So, after playing with them a bit, I decided to drill them and dome them with an abstract brushed surface.

Wow!!  I am so pleased with how they turned out!  You can't even tell these were "washers."

They actually inspired me to make these "Summer Earrings" with "Purple Coral.


Saturday, June 25, 2016

Inspired By A Swallowtail Butterfly


I'm doing a bit of work around the yard these days and I'm noticing many Swallowtail Butterflies around my flowers.  These Butterflies are so pretty!  I especially love the blue with a dab of orange along the back of the wings!

I would love to design a jewelry set in that blue!

I found these beads and shells at Fire Mountain Gems and I think the blue is quite similar (a little side note- there are 527 pages of blue beads and jewelry components.  I sipped on a coffee and relaxed while browsing):

*Beautiful Paua Shell is one of my favorites!!  The blue Swarovski Crystals are very pretty as well!


Thursday, June 9, 2016

Latest Project: Abstract Tree Pendant With Filigree Leaves


Latest project that I'm working on:

Copper and Sterling Silver Pendant with tree and leaves.  I'm making a few cutout leaves
and I'll be adding some filigree to fill in the leaves.

I sweat soldered the leaf and the tree to the copper plate.

If you're looking for a custom made piece, contact me.

See more Jewelry Here.

Monday, June 6, 2016

Finished White Oak Leaf Pendant with Acorn


Sometimes, you come up with an idea in your head, transfer it to paper and the actual piece doesn’t always come out exactly as you first imagined it.  But this piece is pretty much what I designed it to be.  
I purposely added the dark, vein-like lines in the leaf by dragging a piece of metal through the molten enamel. 
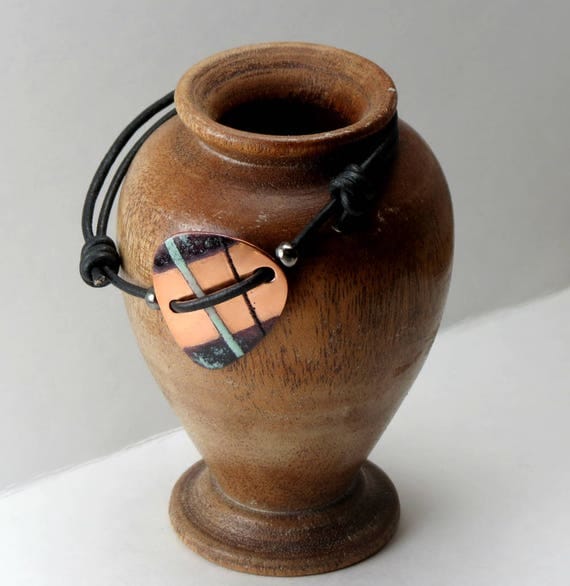
Because the copper was slightly exposed, it created oxidization which led to the lines turning black.  It really gives the piece a more rustic look!  I just love playing with oxidization!!  
The Oak Acorn I made from a piece of white oak piece which I carved into a ball which I drilled like a bead.  I made the cap part out of sheet copper, formed, textured and soldered.  I covered the wood with epoxy.
The Acorn lays flat so that it can sit properly when worn.

Thursday, May 19, 2016

Oak Leaf Pendant Almost Finished


I am almost done this pendant.  I'm working on the wood cab you see
on the pendant.  it will be a bit smaller than you see.  

Here is what I'll be doing next:
- Covering the cab with epoxy (the reason for this is because this piece of 
oak comes from old wood pieces salvaged from a dead oak tree and they're
quite fragile.  By completely covering them with epoxy, I figured they 
would be protected from wear and tear).  

2.  Adding a bezel (a strip of silver soldered to the plate to hold the wood cab 
into place).

3.  Finish the bail (to hang to the chain).

4.  Polish it up and add a bit of darkening solution to make the leaf pop out.

5.  Package it and send it on its way to my customer!


Wednesday, May 18, 2016

Enameled Oak Leaf Pendant Progress


Here is an update of the Oak Leaf that I am working on.  I finally finished prepping the leaf itself and  after rounding out the tips a bit, I finally was able to do the exciting part of this project:  enameling!
I used my jewelry torch to enamel glass powder over the top; so basically you end up with a lovely glass layer fused to the metal.  This is something I just love to do!  

The green I used is Jungle green;  it's a vibrant green which I find looks great for leaves! 
 I am very  pleased with how it turned out.  

I am now working on the acorn part of the pendant which will dangle freely on 
the necklace along the leaf. 


Tuesday, May 3, 2016

Copper Oak Leaf Pendant Progress


Another custom Oak leaf pendant in progress!  This one is a copper leaf
overlay on sterling silver plate.  I just added a bit of texture to
give the leaf a bit of depth.  I still have lots of work to do on
the pendant, but so far I'm quite happy with how it's looking.

I hope the customer will like it as well...  

This is what is left to do: 

* make a bail and solder it to the sterling silver plate;
*sweat solder the copper leaf to the plate;
*make a bezel, solder it to plate;
*prepare the stone (which will be super special with an awesome little story attached).

Stay tuned for the end results!!

Saturday, April 23, 2016

Oak Leaf Pendant in Progress


I am working on another custom order necklace:  Oak leaf pendant on chain. 
I made a template of a leaf, traced it on copper sheet and cut it out, sanded and shaped it.

I love the look of the leaf as it is (the finish I mean).  I achieved this by annealing and lightly sanding the leaf.  Unfortunately, I will not be keeping the look for this project.  We're going for something much cleaner and shinier.  You'll need to stay tuned for the end results!

After doing all of this work, I realized I had to make the smaller version of the leaf... and I needed to cut down the size.  Not a big deal, but it gave me a bit more work.  

I'll have to post the smaller leaf so you can see the new, smaller version.

Happy Crafting all!

Wednesday, July 15, 2015

Silent Auction Jewelry Supplies and More


Cleaning out my Studio and have lots and lots of goodies for sale.  I will be having a Silent Auction to rid all of the things I do not use.  I have jewelry supplies, gemstones, beads, arts and crafts supplies, plus some jewelry from my walk in store.  

Tuesday, April 14, 2015

The Tool I Cannot Live Without

The Flex Shaft tool is one of the most versatile tools a jeweler can have at his disposal.  It's super handy because it's pedal operated, leaving you in complete control!  As you can see in the photograph below, this tool can be used for many applications (not only metal work).  

There are many attachments, bits and accessories you can add to your Foredom Tool.    

In the past, I had purchased a drill press to drill holes in my fused glass pieces, but now with my Foredom flex shaft, I no longer need the drill press for this; I can perform all of my work from my work station.  This tool was the best purchase for my craft!  I could not live without it!

Wednesday, April 1, 2015

Genuine Pearls For Your Jewelry Creations


Ever wonder what you can do with pearls, 14-k gold filled wire and some imagination? Let yourself be inspired by pearls!  Pearls are a timeless and will bring your jewelry creations to a whole new level.


Sunday, March 1, 2015

Agate Semi Precious Stone


Statement Rings are popular, and as a jewelry maker, there are so many amazing stones to choose from.  The ring in the picture is a 14-k gold filled, wire wrapped design with an gorgeous, black
agate.  Notice there's a touch of clear on the tip (near the bottom).

Agate is a popular, semi-precious stone, it's very beautiful and polishes really well.

Click here to ask about a custom ring for yourself or for a gift.


Monday, February 9, 2015

Honey Beach Glass Gems

Beach Glass is quite popular in Northern New Brunswick.  You can take a walk down most beaches along the coastal area and collect a pocket full of these beautiful, gem-like glass fragments.

You'll find such lovely colors such as a variety of greens, sea-foam and emerald being two of my favorites!  We're always excited to find cobalt blue, which make the most awesome jewelry pieces.  But if you really want to see us jump for joy, wait to see when we find an orange piece...  Orange beach glass is considered the King of beach glass and is worth just as much as a gemstone in the jewelry world.  In over a decade, I have only found one piece of orange and I made the pendant you see below.  This wire wrapped pendant was sold to a local client who appreciates beach glass and its fascinating history!
It's not secret that sea glass makes for beautiful jewelry designs!  I also really like it my mosaic work. You can see in the votive, candle holder below, how beautiful these little brown and honey colored sea glass gems are in a mosaic design.  Click here for more information on the votive holder.